Guests can’t visit your property before booking. They decide based on photos. Your images either convince them to book or send them scrolling to the next listing.
This isn’t about having the most expensive camera or the fanciest property. It’s about presenting your space honestly and attractively.
Why Photos Matter More Than Anything
They Determine Click-Through
Your main photo appears in search results alongside dozens of others. Travelers make split-second decisions about which listings to open.
They Set Expectations
Photos promise an experience. When reality matches photos, guests are satisfied. When it doesn’t, they’re disappointed—regardless of how nice the property actually is.
They Justify Your Price
Higher rates require visual proof of value. Professional-looking photos command premium prices. Poor photos make even nice properties look budget.
Professional vs. DIY Photography
When to Hire a Professional
Consider professional photography if:
- You’re targeting premium pricing
- Your property has architectural features or views worth showcasing
- You’ve invested significantly in design and furnishings
- You don’t have equipment or skills for quality photos
- Your current photos aren’t generating bookings
Cost range: $150-$500+ for vacation rental photography
Finding the right photographer:
- Look for real estate or hospitality experience (not wedding photographers)
- Review their portfolio for similar properties
- Ask about turnaround time
- Clarify what’s included (editing, number of final images)
When DIY Works
DIY can work if:
- You have a decent smartphone (recent iPhone or equivalent)
- Your property is well-lit with natural light
- You’re willing to learn basic techniques
- Budget is constrained
- You need photos quickly
What Professional Photographers Do Better
- Understand lighting and composition
- Bring proper equipment (wide-angle lenses, lighting)
- Know how to make spaces look their best
- Edit images professionally
- Capture details you might overlook
Preparing Your Property for Photos
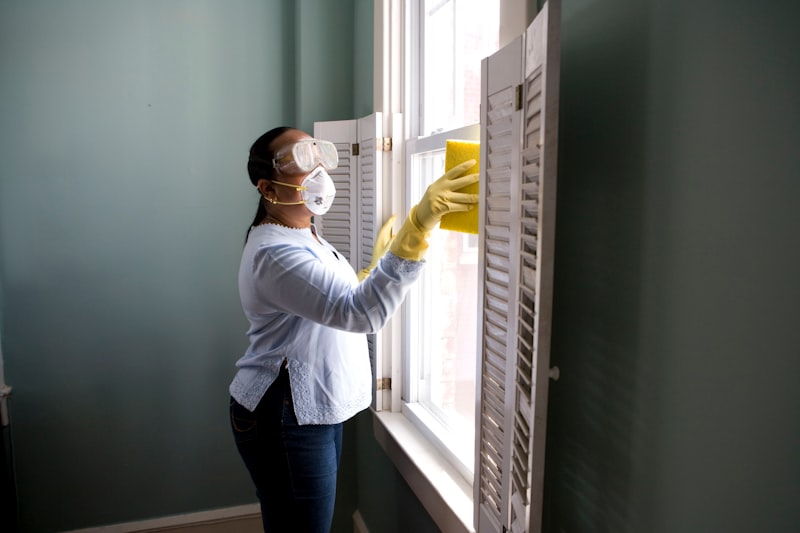
Deep Clean Everything
Cleaning for photos goes beyond normal turnover cleaning:
- Windows sparkling (inside and out if visible)
- No water spots on fixtures
- Floors spotless
- Every surface dust-free
- Grout clean
- Baseboards wiped
Cameras capture every flaw. What you might not notice in person stands out in photos.
Declutter Ruthlessly
Remove or hide:
- Personal items
- Excess decorative objects
- Visible cords and cables
- Trash cans
- Cleaning supplies
- Random items on counters
- Excessive pillows or throws
Less is more. Clean surfaces photograph better than cluttered ones.
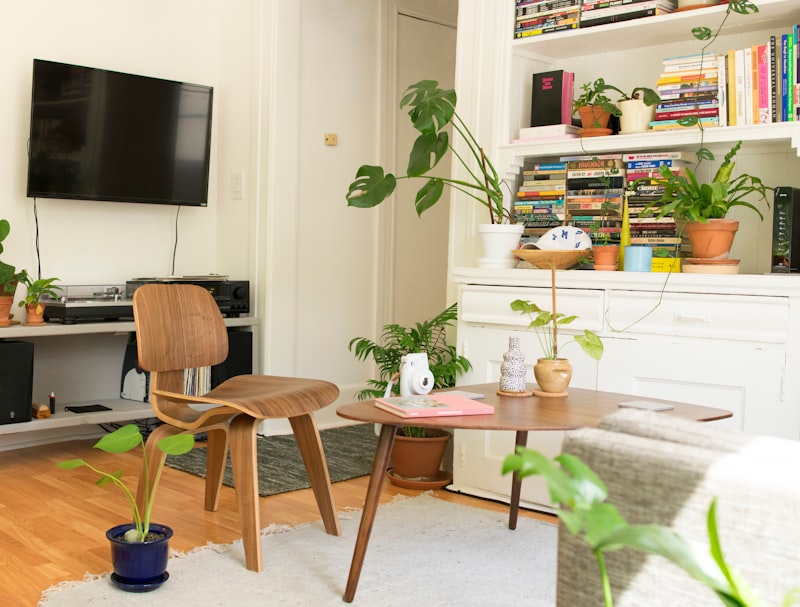
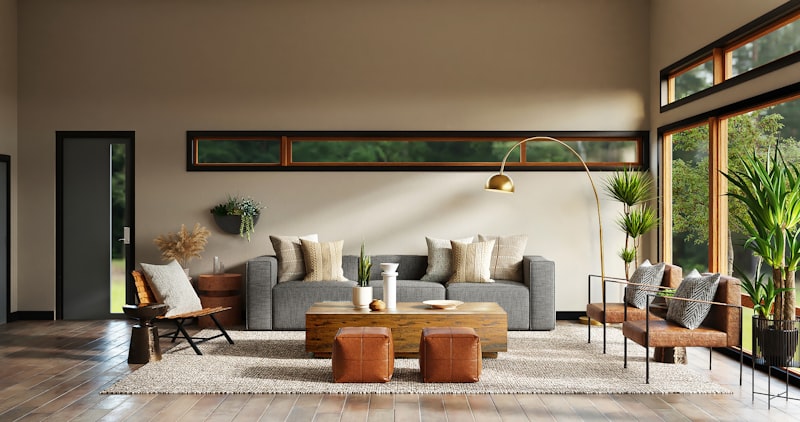
Style Thoughtfully
Add visual interest without clutter:
Kitchen:
- Fresh fruit in a bowl
- Cutting board with bread
- Wine glasses (not full wine bottles)
- Fresh herbs in a pot
Living room:
- Arranged throw pillows
- One or two books
- Plant or flowers
- Cozy throw blanket (folded, not messy)
Bedroom:
- Made bed with crisp linens
- Matching pillows
- Single nightstand item (lamp, book, plant)
- Open curtains for light
Bathroom:
- Fresh white towels
- Small plant
- Soap dispenser (not bar soap)
- Empty counters otherwise
Outdoor:
- Furniture arranged for conversation
- Table set (simply)
- Clean grill (if featured)
- Manicured lawn/plants
Lighting Matters Most
Natural light produces the best results:
- Schedule photos when light is optimal (usually morning or late afternoon)
- Open all blinds and curtains
- Turn on all lights (including lamps)
- Replace any burned-out bulbs
- Match bulb temperatures (all warm or all cool, not mixed)
Avoid:
- Harsh midday sun creating strong shadows
- Dark, evening shots without proper lighting
- Mixed lighting temperatures (warm and cool in same shot)
Essential Shots to Capture
The Hero Shot
Your main image appears in search results. It should:
- Show your property’s best feature
- Be immediately eye-catching
- Convey the overall experience
- Work well as a small thumbnail
Common hero shots:
- Stunning view from property
- Beautiful exterior
- Inviting living space
- Eye-catching design feature
Room-by-Room Coverage
Every room needs:
- Wide shot showing the whole space
- Detail shots of notable features
- Functional shots (beds show sleeping space, kitchen shows cooking area)
Priorities:
- Living areas (where guests spend most time)
- Bedrooms (show all sleeping arrangements)
- Kitchen (functionality and style)
- Bathrooms (cleanliness and amenities)
- Outdoor spaces (if notable)
Amenity Documentation
If you list it, show it:
- Hot tub or pool
- Fire pit
- Game room
- Workspace
- Special equipment (kayaks, bikes, etc.)
- Washer/dryer
- Parking
The View
If your property has a view, capture it well:
- From inside looking out
- Standing where guests would appreciate it
- At optimal time of day
- In good weather (wait if needed)
Exterior Shots
- Front of property (establishes location)
- Back/side if notable
- Parking area
- Outdoor entertaining spaces
- Surrounding area if attractive
Photography Techniques
Use Wide-Angle Perspective
Wide-angle shots make spaces feel larger and show more context. Most smartphone cameras have a wide-angle setting.
Tips:
- Stand in corners to maximize visible space
- Keep camera level (avoid tilting up or down)
- Include some foreground for depth
Shoot from the Right Height
Standard height: Chest to eye level for most rooms Lower angle: Makes ceilings feel higher Higher angle: Shows floor layouts and furniture arrangements
Experiment to find what works best for each space.
Mind the Composition
Rule of thirds: Place key elements along imaginary grid lines Leading lines: Use natural lines to draw the eye Framing: Use doorways, windows, or furniture to frame shots Balance: Distribute visual weight across the image
Take Many Shots
Take far more photos than you need:
- Multiple angles of each space
- Slight variations in positioning
- Different times of day if possible
- Backup shots of everything
You can always delete extras. You can’t recover shots you didn’t take.
Editing and Selection
What to Edit
Appropriate edits:
- Brightness and exposure correction
- Straightening tilted shots
- Color correction for accurate representation
- Cropping for better composition
- Minor blemish removal (outlet covers, light switches)
Inappropriate edits:
- Making rooms look larger than reality
- Removing permanent features
- Adding things that aren’t there
- Over-filtering to unrealistic appearance
- Hiding flaws guests will notice
Selecting Final Images
Choose images that:
- Are sharp and well-lit
- Show accurate representation
- Highlight your property’s strengths
- Tell a complete story of the space
- Work well as a set
Number of images:
- Minimum: 15-20 for platforms
- Ideal: 25-35 well-chosen images
- Maximum: Don’t exceed 40-50 (repetitive hurts)
Image Order Matters
Arrange photos strategically:
- Hero image (best single shot)
- Additional standout features
- Living spaces
- Kitchen
- Bedrooms
- Bathrooms
- Amenities
- Outdoor spaces
- Neighborhood/views
- Practical shots (parking, etc.)
Front-load your best images. Many guests don’t scroll through all photos.
Common Photo Mistakes
Misrepresentation
The biggest mistake is photos that don’t match reality:
- Old photos after significant changes
- Only best angles, hiding problems
- Over-edited images
- Wrong seasonal representation
This leads to disappointed guests and negative reviews.
Technical Failures
- Blurry or out-of-focus images
- Poor lighting (too dark or harsh shadows)
- Tilted horizons
- Visible photographer in mirrors
- Dirty lens creating haze
Staging Mistakes
- Too much clutter
- Visible personal items
- Unmade beds or messy spaces
- Visible trash or cleaning supplies
- Closed curtains
Missing Key Information
- No photos of all bedrooms
- Bathroom not shown
- Exterior missing
- Amenities mentioned but not shown
Updating Your Photos
When to Reshoot
- After significant updates or renovations
- If photos are more than 2-3 years old
- When seasons change (if your area varies dramatically)
- If current photos aren’t generating bookings
- After furniture or decor changes
Seasonal Considerations
Consider having seasonal photo sets:
- Summer/winter exterior shots
- Seasonal decor (holiday, but tasteful)
- Different weather conditions if relevant
Update listing to reflect current season or keep photos neutral.
Great photos are the foundation of successful listings. Learn how our marketing approach presents your property in its best light.
How Much Could Your Property Earn?
Get a free, instant estimate of your vacation rental income potential. No obligation, no waiting.
Powered by real market data from Airbtics, a trusted short-term rental analytics platform.
Property Address
Enter your property address to get started